There are different ways of producing queen cells. It’s always good to have a number at hand, especially during the beginning of the season, but also in the middle of it. Most of the queen cells are needed for early splits, nucs and failing queens. It’s the easiest way of ‘repairing’ a broken colony and to produce a new colony with desired traits and keeping the genetic variation both in the bee stock and in the individual colony. If you let these virgins mate in the apiary and your stock is good enough and the drones from your bees have a lot influence on the matings of the virgins. The very easiest way of making new colonies is of course making so called walk away splits. Take a box of bees and brood and move to a new stand in the same or another apiary. Sometimes they fail to produce a laying queen. Then you save them by giving them a frame of brood and a ripe queen cell of desired heritage. For example from a colony with high VSH index (see an earlier post about that).
I have tried different ways of producing queen cells. For many years I used a modified way of using the Australian or New Zealand method, with an excluder with an entrance and a board that can make the boxes above it queenless. It worked satisfactory. But especially early in the season such starters too often have failed to produce as many as I wanted of the larvae I gave the starter.
Pasaga Ramic is a skilled beekeeper from Bosnia that moved to Sweden many years ago. He has modified a swarm prevention board called Snelgrove board. He uses it in different ways, mostly not for swarm prevention. One way he has invented and tested for some years before writing about it is to produce queen cells. The only thing I had against this method was that it involved some lifting of the broodnest box(-es). But he said it worked so well I had to try it.
I normally use three 12 frame (square) shallow (Langstroth 137 mm high frames) boxes for brood nest. But I reduced it here to two boxes for easier lifting. I choose a not so strong colony just after middle of May (it was on two brood boxes then). And it was time (almost) to give them a third box, so I gave it as a super with a queen excluder.
The way Pasaga uses his Snelgrove board (starter board) you can say this board is just a bottom board with a central netting and a small entrance.
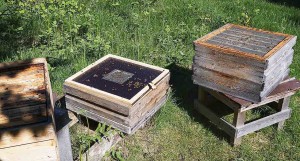
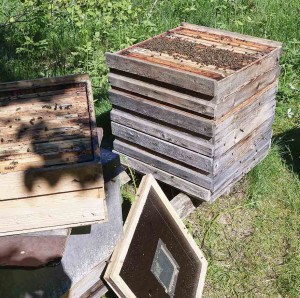
- You place the super on the bottom (normally actually without any brood frames!). Then the starter board with entrance facing backwards in relation to the entrance. Finally the brood box(-es). Later on when the colony needs more supers they come on top (as you see on the picture I have such a super waiting on the left).
- Wait one day, then put the list with the queen cell cups with the larvae in the middle (or about so when you put in two lists).
- Wait another day. Then you take away the starter board and put the brood box(-es) on the bottom, queen excluder, super with queen cell list (plus later on more supers above).
The first time I used the starter board it was ridiculously small amount of bees in the super so I put two brood frames in the middle of it, with a space between them for the list with the larvae. The colony was not that very strong and I doubted it would make many queen cells.
I didn’t look until the cells should be capped and opened to move the few I expected to the incubator. I had put in 15 cellcups with larvae. I got 15 well fed and well built queen cells!
Later on I grafted 30 cell cups for every go and got 26-30 queen cells. Try it!

